BlueRide User Guide for Helpers
1- You will receive an invitation SMS to your mobile number, in order to download BlueRide application, please click the app store button that matches your phone operation system:
2-After downloading the app on your phone, choose your language preference and then press Sign up.
3- Click on Sign Up then Sign up as Helper and fill the information needed to finish the sign up process
4- Verification code will be sent to you, type the code and your account will be activated and ready to use.


Type your Email that was provided by you to school and your password
(Please note: It is your responsibility to keep your password and never share with others)
(please note: to sign in you need to use your email, while during sign up you need your National ID)
In case Forgot Password
It is recommended to click on the link (forgot password) in the login page, it will take you to another page to record your email then send you a message with a link to reset your new password

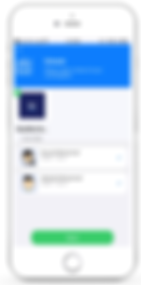

1- From Home page, select the school and your children and then press Start button.
2- You will see an alert by selecting the location, and then clicking the Allow button to allow the application to use Site Recognition.
3- The map will show you your current location and track the way to school.
4-When entering the Yellow Zone (Get Ready Zone), an automatic alert will be sent to the school informing them of your trip, so that the student will be ready to leave.
5- When entering the Green Zone (Pickup Zone) you will then be able to press the Pick Up button, and when pressed, the alert will appear within the school for both the students and the team responsible for organizing the school dropout.
6- Click the Received button to notify the school of your receipt of the student and close the request.
7- If the parent want to cancel the request , just he will press Cancel button.


1- You can edit and update your personal data by pressing the menu and then selecting Settings. Full profile data of you and your students will be shown in one screen.
2- Click the icon at the top of the screen next to the name on the right side.
3- From this property you can modify:
-
Email
-
Password
-
Address
-
Personal photo
When you make any Edit , save the changes until the school is notified of the changes.

